miller mobile home furnace manual

The manual provides essential guidance for the safe installation‚ operation‚ and maintenance of Miller Mobile Home Furnaces‚ ensuring optimal performance and compliance with safety standards.

Overview of the Miller Mobile Home Furnace

The Miller Mobile Home Furnace is a high-efficiency heating solution designed specifically for manufactured and modular homes. Known for reliability and low maintenance‚ these furnaces offer advanced features like ECM motors for precise temperature control. They are available in various models‚ including gas and oil options‚ to suit different home sizes and energy needs. The E7 Series‚ for instance‚ is a popular choice‚ combining durability with energy efficiency. These furnaces are built with insulated cabinets to minimize heat loss and reduce operational noise. Designed for safety and performance‚ Miller furnaces are a trusted option for homeowners seeking dependable heating systems tailored to their unique needs.

Importance of the Manual for Safe and Efficient Operation

The manual is crucial for ensuring the safe and efficient operation of the Miller Mobile Home Furnace. It provides detailed instructions for installation‚ operation‚ and maintenance‚ helping users avoid potential hazards. By following the guidelines‚ homeowners can ensure compliance with safety standards and local building codes. The manual also highlights critical safety precautions‚ such as proper venting and gas line connections‚ to prevent risks like carbon monoxide leaks or fires. Additionally‚ it offers troubleshooting tips to address common issues‚ minimizing downtime and extending the furnace’s lifespan. Adhering to the manual’s instructions ensures optimal performance‚ energy efficiency‚ and reliability‚ making it an indispensable resource for both installers and homeowners.

Key Features of the Miller Mobile Home Furnace

The Miller Mobile Home Furnace is designed with high-efficiency features to provide reliable heating for manufactured homes. It incorporates advanced technologies such as an ECM motor for quieter operation and variable speed airflow‚ ensuring consistent temperature control. The furnace is compact and lightweight‚ making it ideal for installation in mobile homes with space constraints. It also features a direct vent or non-direct vent option‚ offering flexibility in installation. With a robust insulated cabinet‚ the furnace minimizes heat loss and operates quietly. Its high Annual Fuel Utilization Efficiency (AFUE) rating ensures energy savings and eco-friendly performance. These features make the Miller furnace a durable and efficient choice for manufactured housing‚ providing comfort and reliability during the heating season.

Safety Considerations and Precautions

Ensure proper installation‚ venting‚ and gas line connections to prevent hazards. Always follow safety codes and manufacturer guidelines to avoid risks associated with gas furnaces;

Installation Warnings and Guidelines

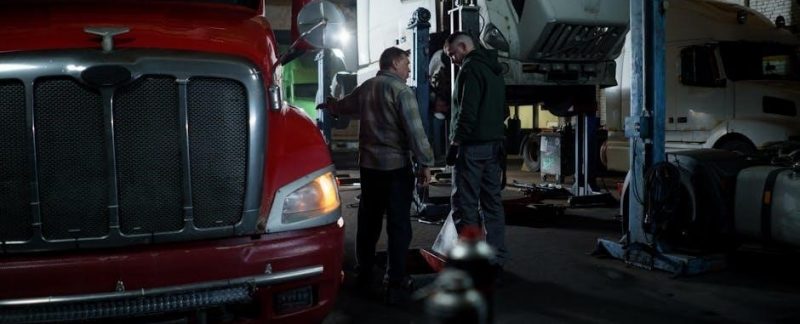
Always follow the manufacturer’s instructions and local building codes for safe installation. The furnace must be vented using an approved system‚ such as the SRJ series roof jack for manufactured homes. Ensure proper gas line connections‚ using certified materials and techniques to prevent leaks. Install the furnace on a level surface and maintain clearance from combustible materials as specified. Electrical connections must be grounded correctly to prevent hazards. Never modify the furnace or its components without authorization‚ as this can void warranties and certifications. Proper installation ensures efficient performance and safety. Consult a qualified technician if unsure about any step.

Safe Operation and Maintenance Practices

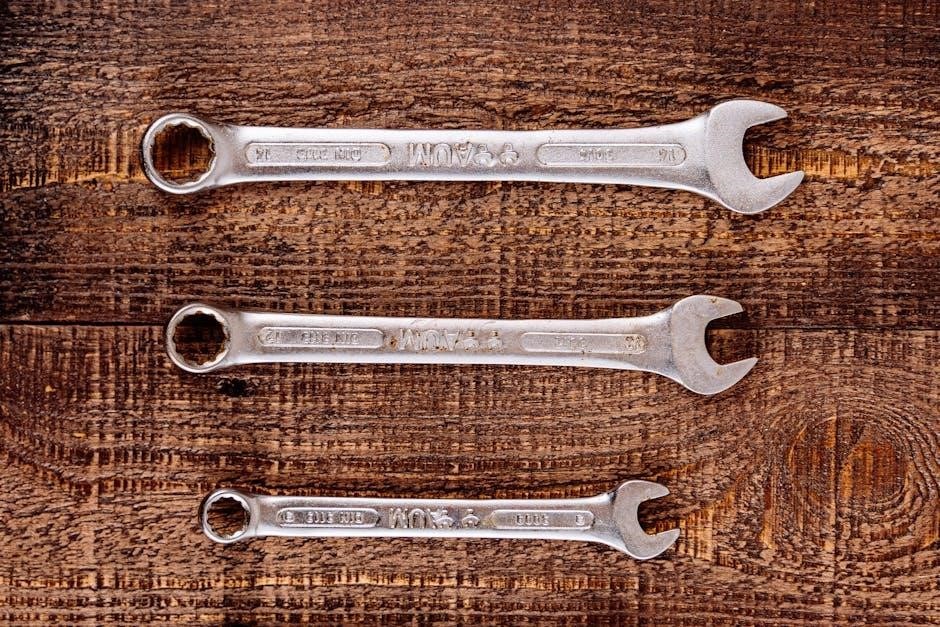
Regular maintenance is crucial for the safe and efficient operation of the Miller Mobile Home Furnace. Always turn off the power and gas supply before performing any maintenance tasks. Inspect the venting system for blockages or damage and ensure all connections are secure. Replace air filters as recommended to maintain airflow and efficiency. Check the heat exchanger for signs of wear or damage‚ and clean the burner compartment annually. Never use flammable materials near the furnace and keep the area clear of debris. Schedule annual professional inspections to identify potential issues early. Proper maintenance enhances safety‚ reduces energy costs‚ and prolongs the furnace’s lifespan.

Emergency Shutdown Procedures

In case of an emergency‚ such as overheating or a gas leak‚ immediately shut off the manual gas valve and disconnect the power supply to the furnace. Open windows for ventilation if safe to do so. Do not attempt to restart the furnace until a qualified technician has inspected and cleared it for operation. If you smell gas‚ evacuate the premises and contact your gas supplier or local authorities. Always follow the manufacturer’s guidelines for emergency situations‚ as outlined in the manual. Regular checks and adherence to safety protocols can help prevent emergencies and ensure the furnace operates safely and efficiently. Proper shutdown procedures are critical to protecting both the system and the occupants of the home.

Installation Requirements and Recommendations

Ensure the furnace is installed following local building codes‚ manufacturer instructions‚ and National Fuel Gas Code guidelines. Proper venting‚ gas line connections‚ and electrical grounding are essential for safe operation.

Location Requirements for the Furnace

The Miller Mobile Home Furnace must be installed in a well-ventilated area‚ away from flammable materials and ignition sources. Ensure proper clearance from walls and ceilings as specified in the manual. The furnace should be located in an area accessible for maintenance and repair‚ avoiding confined spaces. It must comply with local building codes and National Fuel Gas Code requirements. Proper venting systems‚ such as the SRJ series roofjack‚ are mandatory for manufactured housing installations. The furnace should not be installed in areas prone to flooding or excessive moisture. Always follow the manufacturer’s guidelines for placement to ensure safe and efficient operation.

Venting Systems and Compliance

The Miller Mobile Home Furnace requires a venting system that meets specific safety and regulatory standards. For manufactured housing‚ the SRJ series roofjack is mandatory for proper venting. The system must comply with the National Fuel Gas Code and local building regulations. Use approved materials like PVC or ABS for vent pipes to ensure durability and safety. The venting system must be installed to avoid leaks and ensure proper gas flow. Termination points should be at least 12 inches above the roof and 3 feet away from windows or doors. Proper venting prevents carbon monoxide hazards and maintains efficient furnace operation. Always follow the manufacturer’s guidelines for venting to ensure compliance and safety.

Gas Line Connections and Safety Measures

Proper gas line connections are critical for safe operation of the Miller Mobile Home Furnace. Always use approved materials and ensure connections are tight to prevent leaks. The gas line should be installed by a qualified technician‚ adhering to local codes and the National Fuel Gas Code. A shutoff valve must be installed near the furnace for emergency situations. Regular inspections of the gas line are essential to detect any wear or damage. If a leak is suspected‚ turn off the gas supply immediately and contact a professional. Never attempt repairs without proper training. Use a gas detector to monitor for leaks‚ ensuring the system remains safe and efficient. Follow the manufacturer’s instructions for all gas line connections to maintain safety and compliance.

Operating the Miller Mobile Home Furnace

Operating the Miller Mobile Home Furnace involves using the control panel and thermostat to adjust settings for efficient heating. Ensure all operations adhere to the manual’s guidelines safely.

Understanding the Control Panel and Thermostat

The control panel on the Miller Mobile Home Furnace features a digital display and buttons for adjusting settings like temperature and fan speed. The thermostat regulates heating by sensing room temperature and signaling the furnace to cycle on or off. Ensure the thermostat is properly connected and configured according to the manual. The control panel also includes indicators for system status and error codes‚ aiding in troubleshooting. Always refer to the manual for detailed instructions on operating these components safely and efficiently. Proper use of the control panel and thermostat ensures consistent heating and energy efficiency.

Starting the Furnace and Adjusting Settings

To start the furnace‚ ensure the manual gas valve is fully open and the thermostat is set to “heat” mode. Press the ignition button until the burner lights‚ then release. Adjust the thermostat to your desired temperature. The control panel allows you to set the fan speed and heating mode. For optimal performance‚ allow the furnace to complete its cycle without frequent adjustments. If issues arise‚ refer to the troubleshooting guide in the manual. Always follow safety guidelines when operating the furnace. Proper setup ensures efficient heating and extends the system’s lifespan.

Maintenance and Troubleshooting

Regularly inspect filters‚ vents‚ and burners for cleanliness and damage. Address unusual noises or smells promptly. Refer to the manual for diagnostic codes and repair guidance.

Routine Maintenance Steps for Optimal Performance

Regular maintenance is crucial for the Miller Mobile Home Furnace to function efficiently and safely. Start by inspecting and replacing the air filters monthly to ensure proper airflow. Clean the vents and ducts annually to remove dust and debris. Check the burner compartment for obstructions and ensure all connections are secure. Lubricate moving parts as specified in the manual. Schedule a professional inspection annually before the heating season begins. Additionally‚ monitor the furnace’s performance‚ watching for unusual noises or drops in heating efficiency. Addressing issues promptly prevents major repairs and extends the furnace’s lifespan. Always follow the manufacturer’s guidelines for routine maintenance tasks.

Common Issues and Troubleshooting Tips

Common issues with the Miller Mobile Home Furnace include the furnace not heating‚ unusual noises‚ or intermittent operation. If the furnace fails to heat‚ check if the manual gas valve is open and ensure the circuit breaker is not tripped. For noises‚ inspect for loose parts or blockages in the vents. If the furnace stops working‚ verify the gas supply and ensure the thermostat is functioning correctly. Consult the manual for reset procedures if the system shuts down unexpectedly. Regularly cleaning filters and ensuring proper ventilation can prevent many issues. Always refer to the troubleshooting section of the manual for specific guidance and address problems promptly to maintain efficiency and safety. Professional assistance may be required for complex issues.

The Miller Mobile Home Furnace Manual serves as a comprehensive guide to ensure safe‚ efficient‚ and reliable operation of the furnace. By following the installation‚ maintenance‚ and troubleshooting tips outlined‚ users can maximize performance while minimizing potential issues. Regular upkeep and adherence to safety protocols are crucial for long-term functionality. This manual underscores the importance of proper installation and compliance with safety standards‚ ensuring a comfortable and secure heating experience. For any unresolved issues‚ consulting a qualified technician is recommended to maintain the furnace’s optimal condition and extend its lifespan. Refer to this manual periodically to stay informed and ensure your Miller Mobile Home Furnace operates at its best for years to come.

manual jack lalanne power juicer

The Jack Lalanne Power Juicer is a high-performance appliance designed to extract maximum juice from fruits and vegetables with minimal effort. Its powerful motor and efficient design ensure up to 30% more juice compared to other juicers, making it a popular choice for health-conscious individuals. The manual plays a crucial role in guiding users to optimize its features, troubleshoot common issues, and maintain the device for long-lasting performance.

Brief Overview

The Jack Lalanne Power Juicer is a versatile and efficient kitchen appliance designed to extract juice from fruits, vegetables, and even nuts. Its sleek design and powerful motor, operating at 3,600 RPM, ensure quiet and effective juicing. The device is known for producing up to 30% more juice compared to other juicers, with minimal pulp left behind. This makes it a favorite among health enthusiasts seeking maximum nutrition. The juicer also features a non-drip spout, reducing mess and waste. While it excels at juicing whole fruits without peeling or cutting, users often rely on the manual for guidance on assembly, operation, and maintenance to ensure optimal performance and longevity.

Importance of the Manual

The manual for the Jack Lalanne Power Juicer is essential for ensuring optimal use and longevity of the device. It provides detailed instructions for assembly, operation, and maintenance, helping users avoid common mistakes that could damage the juicer. The manual also outlines safety precautions, such as not operating the juicer before reading the entire guide, to prevent accidents. Additionally, it offers troubleshooting tips for issues like excessive noise or the juicer stopping during use. Without the manual, users may struggle to understand how to properly clean or replace parts, which can lead to reduced performance over time. Therefore, having the manual is crucial for maximizing the benefits of the Jack Lalanne Power Juicer while maintaining its efficiency.

How to Obtain the Manual

Access the Jack Lalanne Power Juicer manual by visiting the official Jack Lalanne website or searching online. You can also Google “Jack Lalanne power juicer manual” or contact customer support for assistance.

Official Sources

The official Jack Lalanne website is the primary source for obtaining the power juicer manual. Visit their website and navigate to the support or downloads section. Enter your model number, such as CL-003AP or MT-1000, to access the specific manual. Additionally, Google the exact model with the term “manual” to find direct links or downloadable PDFs. Official retailers like Amazon or eBay may also provide manuals for purchased products. If unavailable online, contact Jack Lalanne customer support directly for assistance. They can provide a copy or guide you to the right resource. Ensure to verify the authenticity of the source to avoid incorrect or outdated information.

Alternative Methods

If the official sources don’t yield the desired manual, consider alternative methods. Check YouTube for instructional videos or tutorials specific to your Jack Lalanne Power Juicer model. Online forums and communities, such as Reddit or specialized appliance forums, often have users who share manuals or provide detailed guidance. Additionally, third-party websites like ManualsLib or ManualsOnline host a wide range of user manuals for various appliances. You can also search for PDF versions of the manual using specific keywords like “Jack Lalanne Power Juicer CL-003AP manual PDF.” These alternative methods can be invaluable when official channels are unavailable or cumbersome.

Key Components and Assembly

The Jack Lalanne Power Juicer includes a motor, pulp guard, pusher, and filter. Assembly involves aligning these parts securely to ensure proper function and optimal juice extraction.

Parts Identification

The Jack Lalanne Power Juicer consists of several key components essential for its operation. The motor serves as the core, powering the juicer at 3,600 RPM for efficient extraction. The pulp guard separates juice from pulp, ensuring a smooth output. The pusher is used to feed fruits and vegetables into the chute, guiding them toward the blade. The filter, also known as the blade, extracts juice while retaining pulp and fibers. Additional parts include the lid with a built-in pulp guard, a spout for pouring juice, and a detachable container for collecting pulp. Identifying these parts is crucial for proper assembly and operation. Each component plays a specific role in maximizing juice yield and minimizing cleanup. Understanding their functions ensures safe and effective use of the juicer.

Step-by-Step Assembly

Assembling the Jack Lalanne Power Juicer is straightforward when following the manual’s guidance. Begin by placing the motor base on a stable surface and attaching the pulp container securely. Next, align the juicer bowl with the motor base and lock it into place using the provided locking mechanism. Ensure the lid is properly aligned with the pulp guard and snapped into position. The pusher should fit snugly into the chute, guiding ingredients toward the blade. Finally, connect the spout to direct juice flow into your collection container.
Always refer to the official manual for precise instructions, as proper assembly is key to optimal performance and safety.

Operating the Juicer

The Jack Lalanne Power Juicer operates efficiently with its 3,600RPM motor, ensuring smooth and quiet juicing. Simply feed ingredients through the chute, and the machine extracts juice effortlessly.

Basic Usage

To start using the Jack Lalanne Power Juicer, ensure all parts are properly assembled. Feed whole fruits or vegetables into the chute, and use the pusher to guide them gently. The juicer’s powerful 3,600RPM motor will extract the juice efficiently while separating the pulp. Collect the juice in a container and discard the pulp. For optimal results, avoid overloading the machine and always operate it on a stable surface. Regularly check the pulp container to ensure smooth functioning. Follow the manual’s guidelines for best practices, and always supervise the juicer while in use to ensure safety and effectiveness.

Advanced Features

The Jack Lalanne Power Juicer offers advanced features that enhance your juicing experience. Its non-drip spout ensures mess-free juicing, while the high-speed 3,600RPM motor handles tough ingredients effortlessly. The sleek, slimline design improves efficiency and reduces noise. Advanced pulp separation means less waste and more juice; Additionally, the juicer supports specialty uses, such as creating soy, rice, or nut milks, expanding its versatility. With these features, users can enjoy a wider range of recipes and healthier beverages. The manual provides detailed guidance on utilizing these advanced functions to maximize the juicer’s potential.

Troubleshooting and Maintenance

The Jack Lalanne Power Juicer requires regular maintenance to ensure optimal performance. Troubleshooting common issues like clogs or noise involves checking for obstructions and proper assembly.

Common Issues

Users of the Jack Lalanne Power Juicer often encounter issues such as clogged pulp containers, excessive noise, or the juicer stopping during operation. These problems can typically be resolved by ensuring proper assembly, cleaning the filter regularly, and avoiding overloading the machine. If the juicer stops unexpectedly, it may be due to overheating or a blockage. In such cases, turning off the power, unplugging the device, and allowing the motor to cool down before restarting is recommended. Additionally, some users report difficulty with pulp management, but freezing pulp for later use is a practical solution. Regular maintenance, such as cleaning the blade and filter, can prevent many of these issues and extend the lifespan of the juicer.

Cleaning Tips

Regular cleaning is essential to maintain the performance and longevity of the Jack Lalanne Power Juicer. Always rinse the filter and blade immediately after use to prevent pulp and juice residue from hardening. Use mild dish soap and warm water for cleaning, ensuring all parts are thoroughly scrubbed. For tough stains, soak components in a mixture of equal parts water and white vinegar for 10-15 minutes. Avoid using abrasive cleaners or scouring pads, as they may damage the surfaces. Dry all parts completely after washing to prevent rust or bacterial growth. For convenience, some users recommend cleaning the juicer while it is still slightly warm, as this makes residue easier to remove. Regular maintenance ensures optimal functionality and hygienic operation.

User Feedback and Conclusion

Users praise the Jack Lalanne Power Juicer for its efficiency and durability, with many highlighting its ease of use and high juice yield. Customers appreciate the comprehensive manual, which ensures optimal performance and troubleshooting. Overall, the juicer is a valued addition to healthy lifestyles, offering long-term benefits for home use.

Testimonials

Customers rave about the Jack Lalanne Power Juicer, praising its durability and ease of use. Julie shared, “I have a Jack LaLanne juicer that will juice a rock—love it!” Ellen added, “I love my Hurom Slow Juicer; it does an excellent job.” Many users highlight how the manual’s clear instructions helped them maximize the juicer’s potential. For instance, one user mentioned, “The manual made it easy to assemble and operate the Model CL-003AP.” Overall, testimonials reflect satisfaction with the product’s performance and the manual’s guidance, making it a trusted choice for health enthusiasts. These positive experiences underscore the juicer’s value for home use.

Final Thoughts

The Jack Lalanne Power Juicer stands out as a reliable and efficient appliance for extracting juice. Its ability to yield up to 30% more juice than other models makes it a favorite among health enthusiasts. The manual is essential for troubleshooting and maintaining the device, ensuring optimal performance over time. Users appreciate its durability and ease of use, with many highlighting how the manual’s guidance helped them get the most out of their purchase. While some noted the need for frequent juicing to collect pulp, the overall consensus is positive. For anyone seeking a powerful and user-friendly juicer, the Jack Lalanne Power Juicer, paired with its comprehensive manual, is an excellent choice for enhancing a healthy lifestyle.

desk manual

A desk manual is an essential guide providing step-by-step instructions for assembling and maintaining your desk. It ensures a smooth, safe, and efficient setup process.

Importance of a Desk Manual

A desk manual is crucial for ensuring proper assembly, safety, and functionality of your desk. It provides clear instructions to avoid errors and potential damage. By following the manual, you can ensure electrical safety, proper lifting techniques, and efficient setup. It also serves as a troubleshooting guide, helping you resolve common issues quickly. Regular maintenance routines outlined in the manual prolong the desk’s lifespan. Adhering to the manual ensures optimal performance and comfort, making it an indispensable resource for both assembly and long-term use.

Preparing for Assembly

Preparing for assembly involves reading the manual, checking all components, and gathering essential tools. Ensure a safe workspace and understand the instructions before starting.

Essential Tools and Materials

Assembling your desk requires specific tools and materials to ensure a smooth process. Common tools include a screwdriver, Allen wrench, hammer, and pliers. Materials like screws, bolts, and washers are typically provided. Additional items such as glue may be needed for extra stability. Ensure all components are included in the packaging to avoid delays. Refer to the manual for a detailed list of required tools and materials. Having everything ready beforehand saves time and minimizes frustration during assembly. A well-prepared workspace is key to a successful setup.

Setting Up Your Workspace

Before starting assembly, prepare a clean, flat, and stable workspace. Use a padded or carpeted area to prevent damage to components. Ensure good lighting for visibility. Organize all tools and materials within easy reach. Unplug the power cord during setup to avoid electrical hazards. Clear the area of obstacles to ensure safe movement. Consider having a second person assist with lifting and positioning heavier parts. Proper workspace setup ensures a safe and efficient assembly process. A well-organized environment minimizes errors and helps you follow the manual effectively.

Step-by-Step Assembly Guide

Follow the detailed instructions for a smooth assembly process. Start with unboxing and inventory, then proceed with step-by-step instructions, diagrams, and final adjustments for proper setup.

Unboxing and Inventory of Components

Begin by carefully unboxing all components and verifying each part against the provided inventory list. Ensure all screws, bolts, and hardware are accounted for. Refer to the manual for a detailed list of included items. Organize the components logically to streamline the assembly process. Check for any damage or missing parts before proceeding. This step is crucial to avoid delays and ensure a smooth setup. Always follow the manufacturer’s guidelines for handling and preparing materials.

Following the Instruction Manual

Always read the instruction manual thoroughly before starting the assembly. Follow each step carefully to ensure proper construction. Pay attention to specific instructions, such as pressing the ‘M’ key to save settings or adjusting sensitivity for obstacle detection. Use the provided diagrams to visualize each part’s placement. Check for cautions, like unplugging the power cord during setup, to avoid risks. Do not skip steps or assume knowledge, as this could lead to errors. Verify all settings and adjustments are correct before finalizing the assembly.

Final Adjustments and Initial Setup

After completing the assembly, make final adjustments to ensure stability and functionality. Level the desk using the leveling studs on the feet to prevent wobbling. Plug in the power cord and test the height adjustment mechanism. Press the ‘M’ key to save your settings, ensuring proper sensitivity for obstacle detection. Double-check all connections and components for tightness. Finally, ensure the workspace is clear of obstacles and test the desk’s operation. Proper initial setup guarantees optimal performance and safety for daily use.

Safety Guidelines

Always follow safety guidelines to prevent accidents and ensure proper desk assembly. Unplug the power cord during setup, use proper lifting techniques, and verify weight limits before use.

Electrical Safety Precautions

When assembling your desk, always unplug the power cord to avoid electrical shock. Ensure no water or moisture comes into contact with electrical components. Avoid overloading circuits with additional devices. Never modify or tamper with the desk’s electrical system, as this can cause malfunctions or hazards. Keep all cables and wires organized and away from moving parts. If unsure about any electrical aspect, consult a professional. Follow the manufacturer’s guidelines strictly to maintain safety and functionality.

Proper Lifting Techniques

Always lift heavy components with care to avoid injury. Bend at the knees, keeping the item close to your body, and use leg muscles to lift. Maintain balance by keeping your back straight and core engaged. For extra-heavy parts, consider enlisting a second person to share the load. Avoid twisting or reaching while lifting, as this can strain your back. Place items on a padded or carpeted surface to prevent damage. Proper lifting ensures both your safety and the desk’s integrity during assembly.

Customizing Your Desk

Customize your workspace by adding ergonomic accessories, cable management systems, and personal touches to enhance functionality and aesthetics, creating a tailored environment for productivity.

Accessorizing for Functionality

Enhance your desk’s functionality with practical accessories like cable management systems, drawer trays, and ergonomic add-ons. Install a cable organizer to keep cords tidy and improve workspace aesthetics. Consider adding a monitor arm or a keyboard tray to optimize your setup for comfort and efficiency. Accessories like a document holder or a USB hub can streamline your workflow. Choose items that align with your work style to create a personalized and organized workspace, ensuring everything is within easy reach to boost productivity and reduce clutter.

Ergonomic Setup

Proper ergonomic setup ensures comfort and reduces strain. Adjust the desk height to align elbows at 90 degrees, wrists straight, and monitor at eye level for optimal posture.

Adjusting for Optimal Comfort

Adjust your desk to a height where your elbows are at 90 degrees, wrists straight, and monitor at eye level. Ensure your chair supports your back and feet rest flat. Use a wrist rest for your keyboard and place your mouse close to avoid reaching. Position your monitor directly in front of you, about 20-25 inches away. Keep frequently used items within easy reach to minimize stretching. Maintain a neutral posture with shoulders relaxed and head level. Regularly stand or move if using a sit-stand desk to promote circulation and energy.

Troubleshooting Common Issues

Identify and resolve common assembly or operational problems by consulting the manual. Check for loose bolts, proper part alignment, and electrical connections. Contact support if issues persist.

Identifying and Resolving Problems

Start by reviewing the instruction manual to pinpoint the issue. Check for loose connections or misaligned parts. For stability issues, ensure all leveling studs are adjusted correctly. If the desk doesn’t move, verify the power cord is plugged in and the control panel is functioning. Consult troubleshooting guides or contact customer support for unresolved problems. Proper identification and timely resolution ensure optimal performance and safety of your desk.

Maintenance Routine

Regularly clean the desk surface and lubricate moving parts to ensure smooth operation. Inspect for wear and tear, and tighten any loose screws or bolts periodically.

Caring for Your Desk

Regular maintenance ensures your desk remains durable and functional. Clean the surface with a soft cloth and avoid harsh chemicals. Lubricate moving parts periodically to maintain smooth operation. Inspect for wear and tear, tightening any loose screws or bolts. Protect the surface from spills and scratches by using coasters or protective mats. Avoid placing heavy objects that exceed weight limits. Store the desk in a dry, stable environment to prevent damage. Follow these care tips to extend the lifespan and preserve the quality of your desk.

Accessories for Enhancement

Enhance functionality with accessories like cable management systems, ergonomic trays, and storage solutions. These additions optimize workspace efficiency and personalization, improving overall user experience.

Optional Features to Consider

Optional features like built-in cable management systems, ergonomic trays, and height adjustment mechanisms can significantly enhance your desk’s functionality. Consider adding a wireless charging pad or USB ports for convenience. Modular add-ons, such as drawer organizers or monitor arms, allow for personalized workspace optimization. Some desks also offer advanced features like smart controls or integrated lighting. These additions can improve productivity, reduce clutter, and create a more comfortable working environment tailored to your specific needs.

A desk manual is an invaluable resource for ensuring your workspace is assembled, maintained, and customized to meet your needs. By following the guidelines and steps outlined, you can achieve a safe, efficient, and personalized setup. Regular maintenance and adherence to safety precautions will extend the life of your desk. Exploring optional features and ergonomic adjustments further enhances your experience. Whether for home or office use, a well-assembled and maintained desk contributes to productivity and comfort, making it a worthwhile investment in your daily routine.

braun s9 pro manual

Braun S9 Pro Manual Overview

The Braun S9 Pro manual provides a comprehensive guide to operating, maintaining, and troubleshooting your electric shaver. It includes key features, safety tips, and maintenance instructions to ensure optimal performance and longevity of the device.

1.1 Key Features of the Braun S9 Pro

The Braun S9 Pro is equipped with advanced shaving technology, including Sonic Pro and SyncroSonic systems for precise and efficient shaving. It features 5 shaving elements, a long hair trimmer, and both wet & dry shaving capabilities. The shaver offers 50 minutes of battery life on a full charge and includes a travel lock for secure portability. Additionally, it boasts a smart display for battery status and maintenance reminders, ensuring optimal performance and convenience for users.

1.2 Navigating the Manual

The Braun S9 Pro manual is organized into clear sections, making it easy to find specific information. It begins with an overview of key features and safety precautions, followed by detailed operating instructions. The manual includes sections on maintenance, troubleshooting, and warranty details. Users can quickly locate information using the table of contents or index. Diagrams and charts are included to help understand complex features and maintenance procedures. This structured approach ensures users can efficiently navigate and utilize the manual to maximize their shaver’s performance and longevity.

1.3 Compatibility and Models

The Braun S9 Pro manual covers various models, including the 9476cc and 9477cc, ensuring compatibility with different user needs. It specifies interchangeable accessories and spare parts, such as replacement foils and cutter cassettes. The manual also highlights model-specific features like the travel lock and cleaning station compatibility. Users can verify their model number to access tailored instructions, ensuring optimal performance and safety. This compatibility guide helps users identify suitable accessories and understand model variations for enhanced functionality and maintenance.

Safety Precautions

Read all safety guidelines in the Braun S9 Pro manual to ensure safe operation. Avoid using the shaver near water or with damaged cords to prevent accidents and electrical hazards.

2.1 General Safety Guidelines

To ensure safe and effective use of the Braun S9 Pro, follow these guidelines. Avoid using the shaver near water or in the bathtub to prevent electrical hazards. Always use the provided power cord and avoid damaged cables. Keep the device out of reach of children and individuals with certain physical or mental conditions that may impair safe usage. Read the manual thoroughly before operation to understand all safety precautions and operating instructions. Proper handling and adherence to these guidelines will help prevent accidents and ensure optimal performance.

Never attempt to modify the shaver or use it for purposes other than its intended design. Regularly inspect the device for damage and refrain from using it if any components are worn or malfunctioning. Follow all warnings and cautions provided in the manual to maintain safety and extend the lifespan of your Braun S9 Pro shaver.

2.2 Usage Restrictions

The Braun S9 Pro is designed for adult use only and should not be used by children. It is intended for cordless operation only, as specified in the manual. Avoid using the shaver near open flames or in hazardous environments. Do not use the device for purposes other than shaving or trimming, as outlined in the user guide. Sharing the shaver is not recommended for hygiene reasons. Ensure the device is used by individuals capable of understanding and following the safety instructions provided in the manual to avoid potential risks.

2.3 Electrical Safety Information

The Braun S9 Pro is equipped with a special power cable featuring a built-in transformer for safe, low-voltage operation. Use only Braun-approved chargers to avoid electrical hazards. Do not expose the device to water while charging or in use, except when cleaning under running water as specified. The shaver is designed for cordless use in bathtubs or showers, ensuring safe operation in wet environments; Always follow the manual’s electrical guidelines to prevent accidents and maintain the device’s performance and safety features.

Operating the Braun S9 Pro

The Braun S9 Pro is designed for easy, efficient shaving and trimming. Use the long hair trimmer for longer hairs and follow the manual’s guidelines for optimal results.

3.1 Getting Started with the Shaver

Unbox and inspect the Braun S9 Pro shaver, ensuring all components are included. Charge the device fully before first use using the provided charging stand. Familiarize yourself with the ergonomic design and controls. Activate the travel lock to prevent accidental start. For optimal performance, trim longer hairs with the integrated long hair trimmer before shaving. The shaver is suitable for both wet and dry use, allowing for flexibility in your grooming routine. Always refer to the manual for specific operating instructions and safety guidelines.

3.2 Charging and Power Management

The Braun S9 Pro requires proper charging to ensure optimal performance. Use the provided charging stand and adapter to charge the device. A full charge typically takes about 60 minutes, providing up to 50 minutes of cordless use. The shaver is designed for cordless operation only, enhancing safety during use. Activate the travel lock before charging to prevent accidental start. Avoid using non-Braun chargers to maintain battery health. Regular charging helps preserve the lithium-ion battery’s longevity. Always refer to the manual for detailed charging instructions and guidelines.

3.3 Using the Long Hair Trimmer

The Braun S9 Pro includes a detachable long hair trimmer for grooming longer hairs. To use it, attach the trimmer cassette by clicking it into place. Ideal for sideburns or neckline trimming, it ensures precise results. For optimal performance, clean the trimmer regularly under running water. Replace the trimmer cassette every 18 months to maintain sharpness. Always trim in the direction of hair growth to avoid skin irritation. Store the trimmer securely when not in use to prevent damage.

Maintenance and Cleaning

Regularly clean the Braun S9 Pro under running water and replace the foil and cutter cassette every 18 months for optimal performance. Proper maintenance ensures longevity and hygiene.

4.1 Cleaning Under Running Water

Cleaning the Braun S9 Pro under running water is straightforward. Turn off the device and rinse the shaving head and trimmer with warm water. For thorough cleaning, use a small amount of liquid soap. Gently brush the foil and cutter cassette to remove hair clippings. Avoid harsh chemicals or abrasive materials. Rinse thoroughly to ensure no residue remains. Regular cleaning prevents clogging and maintains hygiene. For models like the 9476cc and 9477cc, this process is safe and effective, ensuring optimal performance and longevity of the shaver.

4.2 Replacing the Foil and Cutter Cassette

Replace the foil and cutter cassette every 18 months to maintain optimal performance. Turn off the shaver and hold it firmly. Gently pull the cassette away from the shaver’s head. Align the new cassette with the guides and press until it clicks. Ensure it is securely locked to avoid damage. For models like the 9476cc and 9477cc, this process is straightforward. Regular replacement prevents dulling and ensures a smooth shaving experience. Always use genuine Braun parts for compatibility and performance.

4.3 Proper Storage and Handling

Store the Braun S9 Pro in a cool, dry place, away from direct sunlight. After cleaning, ensure the shaver is completely dry before storing. Use the travel lock to prevent accidental activation. For extended storage, charge the battery to 50% to maintain its health. Store the shaver and accessories in the original case or a protective pouch to prevent damage. Always handle the foil and cutter cassette with care to avoid bending or damaging the components. Refer to the manual for model-specific storage recommendations, such as for the 9476cc or 9477cc models.

Troubleshooting Common Issues

Consult the manual for solutions to common problems like the shaver not turning on, charging issues, or cleaning station malfunctions. Follow guided steps for quick resolution.

5.1 Common Problems and Solutions

Address common issues with your Braun S9 Pro, such as the shaver not turning on or improper charging. Check the power button for obstruction and ensure the charger is properly connected. For the cleaning station, verify it is correctly aligned and free from debris. If the shaver is not cutting evenly, clean or replace the foil and cutter cassette as needed. Refer to the manual for detailed troubleshooting steps to resolve these issues effectively and maintain optimal performance.

5.2 Resetting the Device

To reset the Braun S9 Pro, press and hold the power button for 10 seconds until the LED indicates the reset process. Release the button and wait for the device to restart. This action restores factory settings and resolves software-related issues. Ensure the shaver is fully charged before resetting to avoid any interruptions. Note that resetting will not affect the shaver’s functionality but will clear any customized settings. Always refer to the manual for detailed instructions to ensure the reset process is performed correctly and safely.

5.3 Cleaning Station Maintenance

Regularly clean the Braun S9 Pro cleaning station to ensure optimal hygiene and performance. Rinse the station under running water after each use and dry thoroughly to prevent mold buildup. For deeper cleaning, soak the components in warm water and mild detergent. Descale the station every 3-6 months if you live in an area with hard water. Always follow the manual’s instructions for disassembling and reassembling the station to avoid damage. Proper maintenance ensures the cleaning station continues to sanitize your shaver effectively and extends its lifespan.

Warranty and Support

Braun offers a 2-year warranty for the S9 Pro, covering defects in materials and workmanship. Contact customer service for inquiries or visit authorized service centers for assistance.

6.1 Warranty Information

The Braun S9 Pro is backed by a 2-year warranty covering manufacturing defects in materials and workmanship. Registration is recommended for extended benefits. The warranty does not cover wear and tear or misuse. For full terms, refer to the manual or contact Braun support. Authorized service centers handle warranty claims, ensuring genuine parts and expert repairs. Keep your purchase receipt as proof of ownership for warranty validation.

6.2 Contacting Braun Customer Service

For assistance, visit the official Braun website at www.service.braun.com or contact their customer service team directly. Phone support is available in multiple regions, and you can also reach out via email for inquiries. The website provides a comprehensive support section with FAQs, troubleshooting guides, and contact forms. Braun offers multilingual support to ensure all users can access help conveniently. For immediate assistance, call the toll-free number listed on their official website or refer to the manual for regional contact details.

6.3 Authorized Service Centers

For repairs and maintenance, visit an authorized Braun service center. These centers ensure genuine parts and expert service, maintaining your shaver’s warranty. To locate one, visit the official Braun website or refer to the manual. Authorized centers provide reliable assistance, ensuring optimal performance and longevity of your Braun S9 Pro. Always use official service centers to avoid voiding your warranty and ensure quality repairs.

Accessories and Spare Parts

Explore compatible accessories and genuine spare parts for your Braun S9 Pro, including replacement foils, cutters, and travel locks, ensuring optimal performance and longevity of your shaver.

7.1 Compatible Accessories

The Braun S9 Pro supports a range of compatible accessories designed to enhance your grooming experience. These include replacement foils and cutter cassettes, travel locks, and cleaning stations. The long hair trimmer attachment is ideal for maintaining longer facial hair, while the charging stand ensures convenient power management. Additionally, Braun offers travel cases and precision trimmers for added versatility. All accessories are crafted to fit seamlessly with your S9 Pro, ensuring optimal performance and durability. Regularly updating your accessories helps maintain the shaver’s efficiency and extends its lifespan.

7.2 Ordering Spare Parts

Ordering spare parts for your Braun S9 Pro is straightforward. Visit the official Braun website or authorized retailers to purchase genuine replacements, ensuring compatibility and quality. Use the model number (e.g., 9476cc or 9565cc) to find the correct parts. Replacement foils, cutter cassettes, and cleaning station components are readily available. For convenience, online platforms like Amazon or Braun’s official store offer quick delivery. Always opt for genuine Braun parts to maintain performance and warranty validity. Contact customer service for assistance with specific orders or inquiries.

7.3 Using the Travel Lock

The Braun S9 Pro features a convenient travel lock to prevent accidental activation during travel. To activate, slide the lock switch located on the shaver’s base until it clicks. This ensures the device remains off, preserving battery life. To deactivate, simply slide the switch back to its original position. The travel lock is ideal for safe transportation in luggage or bags. Always ensure the lock is disengaged before use to maintain proper functionality. This feature enhances portability and user convenience, making it a practical addition for travelers.

jeep grand cherokee 2013 owners manual

The 2013 Jeep Grand Cherokee Owners Manual is a comprehensive guide providing essential information on vehicle operation, maintenance, and safety features to ensure optimal performance and ownership experience․

Vehicle Identification

The Vehicle Identification section provides details about the Vehicle Identification Number (VIN) and model-year specifics, helping owners verify their Jeep Grand Cherokee’s unique identity and specifications․

2․1 Vehicle Identification Number (VIN)

The Vehicle Identification Number (VIN) is a unique 17-character code assigned to each 2013 Jeep Grand Cherokee․ It provides essential information about the vehicle, including the manufacturer, model year, engine type, and production sequence․ The VIN is typically located on the driver’s side dashboard near the windshield or on the driver’s side doorjamb․ It is crucial for vehicle registration, insurance, and maintenance records․ Additionally, the VIN can be used to verify the authenticity of the vehicle and check its history․ Understanding the VIN is vital for owners to ensure their Jeep Grand Cherokee is properly identified and serviced․ Always refer to the VIN when ordering parts or discussing repairs with a technician․

2․2 Model-Year Identification

The 2013 Jeep Grand Cherokee is part of the fourth generation, produced from 2011 to 2021․ This model year introduced updated features, including a refined interior, advanced infotainment systems, and improved engine options such as the 3․6L V6 and 5․7L V8․ The 2013 model also emphasized enhanced off-road capabilities and luxury, making it a standout in its class․ To identify the model year, refer to the Vehicle Identification Number (VIN) or the manufacturer’s label on the driver’s side doorjamb․ This information is crucial for ordering correct parts and ensuring proper maintenance․ The 2013 Grand Cherokee’s unique blend of power and sophistication solidified its reputation as a versatile SUV, catering to both on-road comfort and off-road adventures․ Understanding the model year helps owners appreciate the specific features and improvements tailored to their vehicle․

Safety Information

The 2013 Jeep Grand Cherokee Owners Manual emphasizes safety precautions and features to ensure driver and passenger protection․ It highlights airbags, seat belts, and electronic stability control to prevent accidents and injuries․ Adhering to these guidelines is crucial for optimal vehicle safety and performance․

3․1 General Safety Precautions

The 2013 Jeep Grand Cherokee Owners Manual outlines essential safety precautions to ensure a secure driving experience․ It emphasizes the importance of wearing seat belts at all times, as failure to do so can result in severe injury or legal consequences․ Drivers are advised to avoid distractions while driving, such as using electronic devices, and to never operate the vehicle under the influence of alcohol or drugs․ Proper supervision of children is also stressed, ensuring they use appropriate child restraints․ The manual warns against overloaded vehicles and loose cargo, which can compromise safety․ Regular checks of safety systems, including airbags and anti-lock brakes, are recommended to maintain optimal protection․

3․2 Key Safety Features

The 2013 Jeep Grand Cherokee is equipped with advanced safety features to protect occupants and prevent accidents․ Seven airbags, including front, side, and curtain airbags, provide comprehensive coverage in the event of a collision․ The vehicle also features anti-lock brakes (ABS) and electronic stability control (ESC), which enhance traction and stability on various road conditions․ A rearview camera and parking sensors assist in avoiding obstacles during low-speed maneuvers․ Additionally, the Grand Cherokee includes trailer sway control for stable towing and a robust body structure designed to absorb and distribute crash energy․ These features, along with its strong safety ratings, make the 2013 Jeep Grand Cherokee a secure choice for drivers and passengers alike․

Instrument Cluster

The instrument cluster in the 2013 Jeep Grand Cherokee provides essential information about the vehicle’s status and performance․ It features a clear and intuitive design with analog gauges for speed, engine RPM, fuel level, and coolant temperature․ Digital displays offer additional data such as odometer readings, trip meters, and gear selection․ Warning lights and indicators alert the driver to potential issues, such as low fuel, open doors, or system malfunctions․ The cluster also includes a driver information center that displays customizable settings, maintenance reminders, and safety alerts․ This comprehensive system ensures drivers stay informed and in control, supporting safe and efficient vehicle operation․ Regular monitoring of the instrument cluster helps maintain awareness of the vehicle’s condition and performance․

Controls and Features

The 2013 Jeep Grand Cherokee features a wide array of controls and features designed for convenience, comfort, and functionality․ The instrument panel houses essential controls, including the infotainment system, climate controls, and driver information center․ The steering wheel includes integrated buttons for cruise control, audio adjustments, and phone functions․ The gearshift offers electronic controls, allowing seamless transitions between drive modes․ Additional features include a Uconnect system with navigation, Bluetooth connectivity, and voice command functionality․ The vehicle also includes a programmable garage door opener and power outlets for charging devices․ These features enhance the driving experience, providing easy access to key functions and modern amenities․ Proper use of these controls ensures a safe and enjoyable journey in the 2013 Jeep Grand Cherokee․

Maintenance

The 2013 Jeep Grand Cherokee requires regular maintenance, including scheduled oil changes, tire pressure checks, and inspections as outlined in the manual․

6․1 Scheduled Maintenance

The 2013 Jeep Grand Cherokee requires regular scheduled maintenance to ensure optimal performance and longevity․ The manual recommends maintenance services at specific mileage intervals, typically every 7,500 to 10,000 miles․ These services include oil and filter changes, tire rotations, and inspections of critical components like brakes, belts, and hoses․ Following the schedule helps prevent potential issues and ensures the vehicle runs efficiently․ Proper maintenance also supports the warranty and overall reliability of the Jeep․ Owners are advised to refer to the manual for a detailed maintenance schedule and guidelines to keep their Grand Cherokee in top condition․

6․2 Fluid Checks

Regular fluid checks are crucial for maintaining the health of your 2013 Jeep Grand Cherokee․ The manual outlines procedures for inspecting engine oil, coolant, transmission, brake, and windshield washer fluids․ Owners should check fluid levels regularly, ensuring they are within recommended ranges․ The condition and color of fluids are also important indicators of vehicle health․ For example, engine oil should appear clean and amber-colored, while coolant should be free of contamination․ If any fluid levels are low or if unusual signs like leaks or discoloration are noticed, immediate attention is required․ Proper fluid maintenance prevents damage to critical systems and ensures smooth vehicle operation․ Always refer to the manual for specific guidelines and recommendations for your Jeep․

6․3 Tire Information

The 2013 Jeep Grand Cherokee manual emphasizes the importance of proper tire maintenance for safety and performance․ Owners should regularly check tire pressure, ensuring it matches the recommended levels found on the tire information placard or in the manual․ Under-inflation can lead to reduced fuel efficiency, uneven tire wear, and increased risk of tire failure․ Tires should also be inspected for signs of damage, such as cracks, punctures, or excessive wear․ The manual advises rotating tires every 8,000 to 10,000 miles to ensure even wear and extend their lifespan․ Additionally, the spare tire should be checked monthly and maintained at the recommended pressure․ Proper tire care enhances vehicle handling, safety, and overall driving experience․ Always refer to the manual for specific tire-related recommendations and guidelines․

Driving Tips

The 2013 Jeep Grand Cherokee manual offers essential driving tips to enhance safety and performance․ Smooth acceleration and gradual braking are recommended to maintain control, especially on uneven terrain․ When cornering, reduce speed to avoid losing traction․ For off-road driving, engage four-wheel drive early and maintain a steady speed․ Avoid sudden maneuvers and use low-range gearing for steep inclines or declines․ Always monitor weather conditions and adjust driving habits accordingly․ Keep a safe distance from other vehicles to allow ample time for reaction․ Proper use of features like hill descent control and electronic stability can improve handling․ By following these tips, drivers can optimize their Grand Cherokee’s performance and ensure a safe, enjoyable driving experience․ Regular practice in various conditions is encouraged to master these techniques․

Off-Road Capabilities

The 2013 Jeep Grand Cherokee excels in off-road environments, equipped with advanced systems like Quadra-Trac II and Quadra-Drive II four-wheel drive․ These systems optimize traction and control, ensuring stability on diverse terrains․ The manual highlights the importance of using low-range gearing for steep climbs or descents and recommends engaging hill descent control for controlled downhill movement․ Proper tire pressure adjustments are advised to maximize grip on loose surfaces․ The Grand Cherokee’s high ground clearance and robust suspension enable navigation of challenging trails․ Skid plates protect critical components, while the electronic limited-slip differential enhances torque distribution․ Drivers are encouraged to familiarize themselves with these features to fully utilize the vehicle’s off-road potential, ensuring a confident and capable experience in rugged conditions․ Regular checks of suspension and drivetrain components are recommended to maintain performance․

Troubleshooting

The 2013 Jeep Grand Cherokee manual provides detailed troubleshooting guides to help identify and resolve common issues․ It covers symptoms, diagnostic procedures, and potential solutions for problems like warning lights, performance issues, or mechanical faults․ Drivers are advised to consult the manual before attempting repairs, as it outlines steps to address issues safely and effectively․ For example, if the “Check Engine” light illuminates, the manual recommends using a code reader to identify the error and provides guidance on how to reset it․ Additionally, it offers tips for resolving common complaints, such as unusual noises or reduced fuel efficiency․ Regular checks of fluid levels, tire pressure, and battery health are emphasized to prevent issues before they arise․ Always refer to a certified technician if problems persist․

Technical Specifications

The 2013 Jeep Grand Cherokee manual outlines key technical specifications, including engine options like the 3․6L V6 and 5․7L V8, with horsepower and torque ratings․ It details transmission types, drivetrain options, and suspension systems․ The manual also lists dimensions, such as wheelbase and ground clearance, crucial for off-road performance․ Fuel capacity, towing limits, and payload ratings are provided to help owners understand their vehicle’s capabilities․ Additionally, it covers electrical systems, including battery specifications and alternator output․ This section ensures owners have a clear understanding of their vehicle’s technical capabilities and limitations, aiding in maintenance and upgrades․ Proper use of these specs ensures optimal performance and longevity of the Grand Cherokee․

Warranty Information

The 2013 Jeep Grand Cherokee manual details the vehicle’s warranty coverage, including the basic warranty and powertrain warranty․ The basic warranty typically covers parts and labor for 3 years or 36,000 miles, while the powertrain warranty extends to 5 years or 60,000 miles․ The manual outlines what is covered under each warranty and the conditions that may void coverage․ It also provides information on roadside assistance programs and any additional warranties for specific components․ Owners are advised to review this section to understand their rights and responsibilities under the warranty․ For further details or to file a claim, contacting Jeep Customer Care is recommended․ This section ensures owners are aware of the protections and support provided by Jeep for their vehicle․ Proper understanding of warranty terms helps in maintaining the vehicle and addressing any potential issues promptly․

Additional Resources

For further assistance, the 2013 Jeep Grand Cherokee manual directs owners to additional resources․ Websites like CarManualsOnline․info and ManualsLib offer free PDF downloads of the manual․ Official Jeep websites also provide digital versions, ensuring easy access․ Owners can explore forums and communities for troubleshooting tips and user experiences․ Dealerships and customer support lines, such as 1-877-IAM-JEEP, are available for personalized assistance․ These resources complement the manual, offering comprehensive support for maintenance, repairs, and understanding vehicle features․ Utilizing these tools helps owners maximize their driving experience and maintain their vehicle effectively․

The 2013 Jeep Grand Cherokee Owners Manual serves as a vital resource for understanding and maintaining your vehicle․ It provides detailed guidance on operation, maintenance, and safety, ensuring optimal performance and longevity․ Whether you’re navigating off-road adventures or urban commutes, this manual is your go-to guide․ Available in both print and digital formats, it offers convenience and accessibility․ For additional support, owners can explore official Jeep websites, customer service, and online forums․ Regularly reviewing the manual helps owners stay informed and confident in their vehicle’s capabilities․ By following its recommendations, you can prolong the lifespan of your Grand Cherokee and enhance your ownership experience․

dji mavic pro user manual

Welcome to the DJI Mavic Pro User Manual, your comprehensive guide to mastering the features, safety, and operation of this advanced drone. This manual is designed to help you understand and utilize your Mavic Pro effectively, ensuring a safe and enjoyable flying experience.

Product Overview and Key Features

The DJI Mavic Pro is a portable, foldable drone designed for high-performance aerial photography and videography. It features a 4K camera with a 3-axis gimbal for stabilized footage, obstacle avoidance technology for safe navigation, and intelligent flight modes like ActiveTrack and TapFly. The Mavic Pro also includes a long-lasting intelligent flight battery and compatibility with the DJI GO 4 app for enhanced control and customization. Its compact design and advanced features make it ideal for both professionals and enthusiasts seeking high-quality results on the go.

Importance of Reading the Manual

Reading the DJI Mavic Pro User Manual is essential for safe and effective operation of the drone; It provides critical information on safety guidelines, legal regulations, and proper usage techniques. Understanding the manual ensures you are aware of potential risks and how to avoid them. Additionally, it explains how to troubleshoot common issues and maintain the drone for optimal performance. Failure to read the manual may lead to improper handling, legal violations, or damage to the device. Familiarizing yourself with the content guarantees a secure and enjoyable flying experience while maximizing the drone’s capabilities.

Pre-Flight Preparation

Ensure the drone and remote are fully functional, batteries charged, and GPS calibrated. Check obstacle avoidance systems and environmental conditions. Always comply with safety guidelines and regulations.

Safety Guidelines and Precautions

Always read the manual thoroughly before first use. Ensure the drone is operated in open areas, away from obstacles, people, and airports. Maintain a clear line of sight and avoid flying in bad weather. Keep the drone away from water and flammable materials. Use propeller cages in confined spaces. Follow local aviation regulations and ensure compliance with legal requirements. Regularly inspect the drone for damage. Never fly near power lines or sensitive equipment. Keep the remote controller and drone away from children and pets.

Unboxing and Physical Components

Upon unboxing, you’ll find the Mavic Pro drone, remote controller, Intelligent Flight Battery, propellers, and a quick start guide. The drone features a foldable design with four arms, a gimbal-stabilized camera, and obstacle avoidance sensors. The remote controller includes a clamp for your smartphone and a joystick layout for precise control. Additional items may include a carrying case, charger, and USB cables. Familiarize yourself with each component to ensure proper assembly and functionality before the first flight.

Activating the Drone and Remote Controller

To activate your Mavic Pro, power on the drone and remote controller. Ensure the drone is in an open area, then press and hold the power button until the LED indicators turn green. The remote controller will automatically link with the drone. Open the DJI GO 4 app, scan the Wi-Fi QR code on the drone’s arm, and follow on-screen instructions to complete the connection. This setup ensures proper communication between the drone and controller, allowing you to access all features and functions for a seamless flying experience.

Setting Up the Mavic Pro

Download and install the DJI GO 4 app, update the firmware via DJI Assistant 2, and synchronize the remote controller for a seamless setup experience.

Downloading and Installing the DJI GO 4 App

To begin, download the DJI GO 4 app from the official DJI website or your device’s app store. Ensure your smartphone is compatible with the app, either iOS or Android. Once downloaded, install the app and launch it. You will need to create or log in to your DJI account. After opening the app, connect your Mavic Pro by scanning the Wi-Fi QR code located on the drone’s front arm. This step is essential for syncing the aircraft and remote controller, enabling full functionality and access to advanced features.

Firmware Update Process

To update your Mavic Pro’s firmware, connect the aircraft to your computer using a USB cable. Ensure the drone’s battery is fully charged. Open the DJI GO 4 app, navigate to the settings menu, and select “Firmware Update.” Follow the on-screen instructions to download and install the latest firmware. The process typically takes 15 minutes. Keep the drone powered on and connected throughout the update. Do not interrupt the process, as this could cause system errors. Once complete, restart the drone and remote controller to apply the updates. Refer to the user manual for detailed instructions.

Connecting the Remote Controller

To connect the remote controller to your Mavic Pro, launch the DJI GO 4 app and tap the top-right icon. Scan the Wi-Fi QR code located on the drone’s front arm to establish a connection. Ensure your Android device is connected to the drone’s Wi-Fi network. The remote controller will automatically link once the connection is established. In open areas with minimal interference, the transmission distance can reach up to 262 feet. For detailed instructions, refer to the user manual or in-app guides to ensure a smooth setup process.

Flight Basics

Master essential flight skills, including takeoff, landing, and navigation, ensuring a smooth and controlled flying experience with the Mavic Pro.

Pre-Flight Checks and Calibration

Before each flight, ensure the Mavic Pro is airworthy by performing essential pre-flight checks. Inspect the propellers for damage, secure them firmly, and verify the drone’s body for any visible damage. Update the firmware to the latest version using the DJI GO 4 app. Calibrate the compass by following in-app instructions and ensure the IMU is functioning correctly. Check the battery level, ensuring it is fully charged, and avoid flying in extreme weather conditions. Always verify GPS signal strength and calibrate the remote controller sticks for optimal responsiveness.

Understanding Flight Modes

The DJI Mavic Pro offers multiple flight modes to enhance your flying experience. Sport Mode allows for high-speed cruising, while Tripod Mode provides precise, stable movements for professional footage. Intelligent Flight Modes include ActiveTrack for following subjects, Waypoints for autonomous flights, and Terrain Follow for maintaining altitude over varying ground. Each mode is designed for specific scenarios, ensuring versatility and control. Familiarize yourself with these modes to optimize your drone’s performance and capture stunning results in various conditions.

Advanced Features

The DJI Mavic Pro boasts advanced features like obstacle avoidance, intelligent flight modes, and the Return to Home (RTH) function. Its triple camera system captures stunning 5.1K video, while omnidirectional sensing ensures safe navigation in complex environments.

Obstacle Avoidance and sensors

The DJI Mavic Pro is equipped with advanced obstacle avoidance systems and sensors, including forward, downward, and sideward obstacle sensing. These features enable the drone to detect and avoid obstacles automatically, enhancing flight safety. The sensors work in various environments and reduce the risk of collisions during autonomous flights or manual operation. This technology is particularly useful in complex settings, ensuring smoother navigation and protecting both the drone and its surroundings from potential damage.

Intelligent Flight Modes

The DJI Mavic Pro offers a variety of intelligent flight modes designed to enhance your aerial photography and videography experience. These include ActiveTrack for tracking subjects, TapFly for easy navigation, and Waypoints for creating complex flight paths. Additionally, the Tripod mode ensures smooth and stable footage in tight spaces. These modes utilize the drone’s advanced sensors and algorithms to deliver precise and intuitive control, allowing you to focus on capturing stunning content while the drone handles the complexity of flight.

Using the Return to Home (RTH) Feature

The Return to Home (RTH) feature ensures the Mavic Pro safely returns to its starting point in critical situations. Activated via the remote controller or the DJI GO 4 app, RTH uses GPS to navigate back to the home location. Ensure GPS is available for accurate navigation. The drone will automatically ascend to avoid obstacles and return to the home point. RTH is essential for safety, preventing loss, and ensuring the drone returns securely when signal is lost or battery is low. Always test this feature in open areas to familiarize yourself with its operation.

Care and Maintenance

Regularly clean the drone and remote controller with a soft cloth. Store in a dry, cool place away from direct sunlight. Always check and secure all components before flight.

Proper Storage and Handling

Store your DJI Mavic Pro in a cool, dry place away from direct sunlight. Use the original packaging or a protective case to prevent damage. Avoid exposing the drone to extreme temperatures or moisture. Clean the aircraft and remote controller regularly with a soft cloth to remove dirt and debris. Handle the gimbal and camera with care, ensuring no direct pressure is applied. Store the battery separately at 50% charge for extended periods. Always inspect the propellers and components for damage before and after flights. Proper storage and handling ensure longevity and optimal performance of your Mavic Pro.

Maintenance Tips for Longevity

Regularly update the firmware for the drone, remote controller, and batteries to ensure optimal performance. Clean the aircraft, gimbal, and camera using a soft cloth to prevent dust buildup. Inspect propellers for damage and replace them if necessary. Check and tighten all screws and connectors periodically. Store batteries at 50% charge for extended storage and avoid extreme temperatures. Use official DJI accessories to maintain compatibility and safety. Perform calibration of the compass, IMU, and gimbal as recommended. Follow these maintenance tips to extend the lifespan and ensure the reliability of your DJI Mavic Pro.

Troubleshooting Common Issues

Firmware issues? Ensure all components are updated to the latest version. Connection problems? Reset the Wi-Fi on the aircraft and remote controller. Flight restrictions? Check the DJI GO 4 app for no-fly zones. GPS issues? Calibrate the compass in an open area. Battery concerns? Charge and discharge cycles may need resetting. For persistent issues, refer to the DJI support website or contact customer service for assistance. Regular troubleshooting ensures smooth operation and extends the lifespan of your Mavic Pro.

jeep patriot owners manual 2015

This comprehensive guide provides essential information about your 2015 Jeep Patriot‚ including features‚ operation‚ maintenance‚ and safety tips‚ ensuring a safe and enjoyable driving experience.

Purpose and Structure of the Manual

Important Safety Information and Warnings

This section highlights critical safety precautions to ensure safe vehicle operation. It includes warnings about seat belt usage‚ airbag systems‚ and proper driving practices. Adhering to these guidelines helps prevent accidents and injuries. Always refer to the Supplemental Restraint System (SRS) details and other safety-related information to maximize protection for drivers and passengers.

Vehicle Features and Specifications

The 2015 Jeep Patriot offers a blend of rugged design‚ versatile features‚ and reliable performance. It includes options like 4×2 and 4×4 drivetrains‚ a 2.4L engine‚ and modern amenities.

Overview of the 2015 Jeep Patriot Model

The 2015 Jeep Patriot is a compact SUV known for its boxy‚ rugged design and versatility. Produced as part of the final generation‚ it offers a choice of front-wheel and four-wheel drive options‚ making it suitable for both urban and off-road environments. The model features a practical interior‚ ample cargo space‚ and a range of optional features for enhanced comfort and functionality.

Key Features and Options Available

The 2015 Jeep Patriot offers a variety of standard and optional features‚ including air conditioning‚ power windows‚ and a six-speaker audio system. Optional upgrades include a leather-wrapped steering wheel‚ heated front seats‚ and a premium sound system by Boston Acoustics. Additionally‚ the Patriot can be equipped with advanced technology features such as a Uconnect infotainment system and navigation for enhanced connectivity and convenience.

Technical Specifications and Performance Details

The 2015 Jeep Patriot features a 2.0L or 2.4L four-cylinder engine‚ producing up to 172 horsepower and 165 lb-ft of torque. It offers a five-speed manual or six-speed automatic transmission‚ with optional all-wheel drive for enhanced traction. The Patriot achieves an estimated EPA rating of 23 MPG city and 28 MPG highway‚ providing a balance of power and efficiency for both urban and off-road adventures.

Operating the Vehicle

Learn how to start‚ stop‚ and drive your 2015 Jeep Patriot safely‚ including proper use of transmission and driving modes for optimal performance and control on various terrains.

Starting and Stopping the Engine

Insert the key into the ignition switch and turn it clockwise to start the engine. Ensure all controls are checked before starting. To stop‚ shift into park‚ apply the brake‚ turn the ignition counterclockwise‚ and remove the key. Always ensure the vehicle is stationary before turning off the engine for safety. Follow proper shutdown procedures to avoid damage or malfunctions.

Transmission and Driving Modes

The 2015 Jeep Patriot features a continuously variable transmission (CVT) or a six-speed automatic‚ offering smooth shifting and optimal performance. For enhanced control‚ use the manual shift mode. The Freedom Drive I system provides all-wheel drive for traction on various surfaces‚ while Freedom Drive II is designed for more challenging off-road conditions. Always consult the manual for mode recommendations and optimal driving performance.

Basic Driving Tips and Guidelines

For safe and efficient driving‚ always maintain a safe distance and adjust speed according to road conditions. Use smooth acceleration and avoid abrupt maneuvers. Ensure proper tire pressure and regularly check fluid levels. Familiarize yourself with the vehicle’s features‚ such as all-wheel drive modes‚ to optimize performance. Always wear a seatbelt and ensure passengers do the same for maximum safety.

Maintenance and Care

Regular maintenance and inspections ensure optimal performance and longevity. Check oil‚ tire pressure‚ and fluid levels regularly. Adhere to the manufacturer’s schedule for best results.

Scheduled Maintenance Requirements

Regular maintenance is crucial for optimal performance. Schedule oil changes every 5‚000 to 7‚500 miles‚ tire pressure checks monthly‚ and brake pad inspections every 30‚000 miles. Fluids‚ including coolant and transmission‚ should be checked every 30‚000 miles. Replace the air filter every 15‚000 to 30‚000 miles and spark plugs at 100‚000 miles. Follow the recommended intervals in your owner’s manual for all services.

Fluid Check and Replacement Guidelines

Regular fluid checks ensure optimal vehicle performance. Engine oil should be checked every time you refuel‚ while coolant‚ transmission‚ and brake fluid levels should be inspected during routine services. Replace engine oil every 5‚000 to 7‚500 miles and coolant every 60‚000 to 100‚000 miles. Brake fluid should be changed every 30‚000 miles. Always refer to your owner’s manual for specific recommendations.

Tire Pressure and Rotation Recommendations

Check tire pressure monthly and before long trips‚ using the pressure specified in the owner’s manual or tire information placard. Rotate tires every 6‚000 to 8‚000 miles to ensure even tread wear and extend tire life. Proper tire pressure improves fuel efficiency‚ handling‚ and safety‚ while regular rotations prevent uneven wear and prolong tire durability for optimal performance.

Safety Features and Precautions

The 2015 Jeep Patriot features a Supplemental Restraint System (SRS) and Vehicle Security Alarm. Follow emergency procedures and safety tips outlined in the manual for secure operation and maintenance.

Supplemental Restraint System (SRS) Details

The 2015 Jeep Patriot’s SRS includes airbags and seat belts to enhance safety. Proper use of seat belts is crucial for optimal protection. The system activates in severe collisions‚ ensuring passenger safety. Regular maintenance of the SRS is essential‚ and any issues should be addressed promptly by authorized professionals to maintain reliability and effectiveness in emergencies.

Vehicle Security Alarm System

The 2015 Jeep Patriot’s security alarm system enhances vehicle protection. It activates when unauthorized entry is detected‚ such as opening doors or trunk without disarming. The system arms automatically when the ignition is off and disarms when the key is inserted. Proper use ensures added safety and prevents unauthorized access‚ maintaining your vehicle’s security at all times effectively.

Emergency Procedures and Safety Tips

In emergencies‚ ensure all occupants wear seat belts to minimize injury risk. Familiarize yourself with evacuation procedures and alarm system disarming. Keep doors and windows closed during collisions to maintain structural integrity. Follow proper towing and recovery methods to avoid damage. Regularly check safety systems like airbags and anti-lock brakes for optimal functionality‚ ensuring your vehicle is always road-ready and secure for all passengers.

Troubleshooting Common Issues

Identify and address common issues like transmission problems or alarm malfunctions by consulting the manual. Regular checks and professional assistance can prevent major repairs and ensure reliability.

Diagnosing and Addressing Transmission Problems

Diagnose transmission issues by monitoring performance‚ checking fluid levels‚ and observing warning lights. Address problems promptly by consulting the manual or contacting a professional. Regular maintenance can prevent early transmission failure‚ ensuring smooth operation and extending longevity. Always refer to the manual for specific diagnostic steps and repair guidelines tailored to your vehicle.

Resolving Alarm System Malfunctions

Address alarm malfunctions by checking the system’s sensors and connections. Ensure the vehicle is properly disarmed using the key fob or ignition key. If issues persist‚ consult the manual for reset procedures or contact Jeep customer support for professional assistance. Regular system checks can prevent unauthorized triggers and ensure reliable security performance.

Understanding Warning Lights and Indicators

The 2015 Jeep Patriot features a range of warning lights and indicators on the dashboard to alert drivers of system malfunctions or maintenance needs. These include indicators for engine issues‚ tire pressure‚ and security system status.

Consult the owner’s manual for detailed explanations of each symbol and recommended actions to address alerts‚ ensuring safe and efficient vehicle operation.

Technical Specifications and Diagrams

The 2015 Jeep Patriot manual provides detailed technical specs‚ including engine‚ transmission‚ and electrical system info. Diagrams illustrate component locations and wiring for easy reference and repairs.

Engine and Transmission Specifications

The 2015 Jeep Patriot features a 2.0L or 2.4L inline-four engine. The five-speed manual or six-speed automatic transmissions provide smooth power delivery. The engines offer up to 172 horsepower and 165 lb-ft torque‚ ensuring efficient performance for both city and off-road driving conditions. Proper maintenance ensures optimal engine and transmission longevity.

Electrical System and Battery Information

The 2015 Jeep Patriot uses a 12-volt electrical system with a maintenance-free battery. Regular battery checks ensure optimal performance. The alternator charges the system while the engine runs. Proper care includes avoiding extreme temperatures and ensuring connections are clean. Refer to the manual for wiring diagrams and electrical component locations to diagnose or repair issues effectively.

Wiring Diagrams and Component Locations

The manual provides detailed wiring diagrams to help identify electrical components and their locations. These diagrams are essential for diagnosing and repairing issues. Key components like the battery‚ alternator‚ and fuse box are highlighted‚ with locations clearly marked. Refer to the manual or DVD for precise instructions and visuals to ensure accurate repairs and maintenance of your 2015 Jeep Patriot.

Warranty and Customer Support

Your 2015 Jeep Patriot is backed by a comprehensive warranty program. Contact Jeep Customer Service for assistance‚ or access additional resources and support through the official website.

Understanding Your Vehicle’s Warranty

Your 2015 Jeep Patriot is protected by a comprehensive warranty program designed to provide coverage for parts and labor. The warranty includes a 3-year/36‚000-mile basic vehicle warranty and a 5-year/100‚000-mile powertrain warranty. Additional details‚ including roadside assistance and tire warranty information‚ can be found in your owner’s manual or by contacting Jeep Customer Service directly.

Contacting Jeep Customer Service

For assistance with your 2015 Jeep Patriot‚ contact Jeep Customer Service at 1-877-IAM-JEEP (1-877-426-5337) in the U.S. or 1-800-465-2001 in Canada. Visit www.mopar.ca for additional support. Representatives are available to address inquiries‚ concerns‚ or provide further information on your vehicle’s features‚ maintenance‚ or warranty.

Downloading the Owner’s Manual and Additional Resources

Download the 2015 Jeep Patriot Owner’s Manual and additional resources online. Visit the official Jeep website or platforms like ManualsLib to access the PDF manual. The 132-page User Guide and 572-page Owners Manual are available for free download. These resources provide detailed information on features‚ maintenance‚ and troubleshooting for your vehicle‚ ensuring you have all the necessary information at your fingertips.

cessna 310 maintenance manual

The Cessna 310 Maintenance Manual is a comprehensive guide covering models F-K‚ offering detailed repair and maintenance instructions. It’s essential for professionals and DIY enthusiasts‚ available on a USB drive with PDFs for easy access.

1.1 Overview of the Cessna 310 Aircraft

The Cessna 310 is a twin-engine aircraft known for its speed and efficiency‚ popular among private and commercial pilots. Introduced in the 1960s‚ it remains a valuable asset with proper maintenance. The service manual for 1961-1966 models (F-K) includes detailed instructions for repair and maintenance‚ ensuring optimal performance and longevity. Its popularity endures due to its reliability and cost-effectiveness.

1.2 Importance of Regular Maintenance

Regular maintenance is crucial for ensuring the safety‚ reliability‚ and performance of the Cessna 310. Proper upkeep prevents costly repairs‚ enhances fuel efficiency‚ and maintains airworthiness. Adhering to the maintenance manual’s guidelines ensures compliance with safety standards and preserves the aircraft’s value. Consistent inspections and timely repairs are essential for extending the lifespan and operational efficiency of the Cessna 310.

General Maintenance Requirements

The Cessna 310 requires regular inspections‚ specific tools‚ and adherence to engine guidelines to ensure optimal performance and airworthiness. Compliance with these standards is vital for safety and longevity.

2.1 Scheduled Inspection Intervals

The Cessna 310 maintenance manual outlines specific inspection intervals‚ including annual inspections and 100-hour checks. These schedules ensure compliance with safety standards and prevent potential issues. Regular checks focus on critical systems like engines‚ fuel‚ and electrical components. Adhering to these intervals is crucial for maintaining airworthiness and extending the aircraft’s operational life.

2.2 Tools and Equipment Needed

Essential tools for Cessna 310 maintenance include wrenches‚ screwdrivers‚ and aviation-specific tools. Specialized equipment like compression testers and fuel system analyzers is also required. These tools ensure proper inspection and repair‚ adhering to safety and regulatory standards. The manual provides a detailed list‚ aiding professionals and DIY enthusiasts in maintaining the aircraft effectively.

Service Manual for Cessna 310 (1961-1968)

This manual covers models F-K‚ providing comprehensive instructions for maintenance and repair. It includes detailed illustrations and diagrams‚ making it an essential resource for mechanics and enthusiasts alike.

3.1 Models Covered (310F‚ 310G‚ 310H‚ 310I‚ 310J‚ 310K)

The manual spans models 310F through 310K‚ ensuring comprehensive coverage for each variant. Detailed specifications and maintenance procedures specific to each model are included‚ allowing for precise and effective service. This ensures that all aspects of these aircraft are addressed‚ providing a tailored approach for optimal upkeep and performance.

3.2 Revision Information and Updates

The manual includes revisions and updates for models 310F through 310K‚ incorporating changes from 1993 to 2000. These updates address inspection intervals‚ equipment replacements‚ and technical corrections‚ ensuring compliance with safety standards. Regular updates ensure the manual remains relevant‚ providing accurate guidance for maintaining airworthiness and optimal aircraft performance.

Service Manual for Cessna 310 (1969-1974)

This manual covers models from 1969 to 1974‚ detailing specific maintenance procedures‚ technical updates‚ and corrections. It ensures compliance with safety standards and optimal aircraft performance.

4.1 Specifics for Later Models

The 1969-1974 Cessna 310 models introduced advancements in avionics and engine efficiency. The manual outlines enhanced inspection intervals‚ updated tool requirements‚ and new diagnostic procedures. It also addresses airflow improvements and fuel system modifications specific to these later models‚ ensuring safe and efficient operation. Compliance with these specifics is crucial for maintaining airworthiness and performance standards.

4.2 Temporary Revisions and Corrections

Temporary revisions for the 1969-1974 Cessna 310 manual include updates made between 1993 and 2000. These revisions address inspection time limits‚ equipment replacement intervals‚ and critical corrections. They ensure compliance with safety standards and reflect advancements in maintenance practices. Staying updated with these revisions is essential for maintaining airworthiness and operational safety of the aircraft.

Parts Manual for Cessna 310

The Cessna 310 Parts Manual provides a detailed catalogue of components‚ including part numbers‚ diagrams‚ and descriptions. It is an essential resource for identifying and ordering replacement parts‚ ensuring accurate repairs and maintenance. This manual is crucial for both professional mechanics and DIY enthusiasts to maintain the aircraft’s airworthiness and performance.

5.1 Detailed Parts Catalogue

The Cessna 310 Parts Catalogue provides an exhaustive list of components‚ including part numbers‚ diagrams‚ and descriptions. It covers models 310F to 310K‚ ensuring accurate identification and ordering of replacement parts. This catalogue is indispensable for mechanics and enthusiasts‚ offering clear references for maintenance‚ repairs‚ and upgrades to maintain airworthiness and performance.

5.2 Ordering and Replacement Guidelines

The manual outlines step-by-step procedures for ordering parts and replacing components. It emphasizes compliance with FAA standards‚ ensuring authenticity and compatibility. Detailed instructions guide users through the replacement process‚ minimizing errors and downtime. Proper documentation and record-keeping are stressed to maintain airworthiness and operational safety of the Cessna 310 aircraft.

Engine Overhaul and Maintenance

The Continental IO-470 engine requires regular overhauls and adherence to detailed procedures. This section provides specifications‚ maintenance schedules‚ and guidelines to ensure optimal performance and safety.

6.1 Continental IO-470 Engine Specifications

The Continental IO-470 engine powers the Cessna 310‚ known for its fuel injection system and robust performance. With six cylinders‚ it delivers 260 horsepower‚ offering excellent speed and efficiency. This engine requires precise maintenance‚ including regular oil changes and fuel system checks‚ to ensure reliability and longevity. Adhering to the manual’s guidelines is crucial for optimal operation;

6.2 Step-by-Step Overhaul Procedures

The Continental IO-470 engine overhaul involves detailed disassembly‚ inspection‚ and reassembly. Critical steps include cylinder removal‚ crankshaft inspection‚ and piston replacement. Adhering to torque specifications and lubrication guidelines is essential. The process requires specialized tools and strict compliance with FAA airworthiness directives. Regular updates in the manual ensure procedures remain current and effective for maintaining engine performance and safety.

Airworthiness Directives and Service Bulletins

Airworthiness Directives (ADs) and Service Bulletins ensure compliance with safety standards. They outline mandatory inspections‚ repairs‚ and updates for the Cessna 310‚ addressing critical issues and enhancing performance.

7.1 Compliance Requirements

Compliance with Airworthiness Directives (ADs) and Service Bulletins is mandatory for maintaining the Cessna 310’s airworthiness; These directives outline specific inspections‚ repairs‚ and parts replacements to ensure safety and performance. ADs are issued by aviation authorities to address potential issues‚ while Service Bulletins provide recommended updates. Non-compliance can result in the aircraft being deemed unairworthy. Regular reviews and implementation of these directives are essential for owners and mechanics.

7.2 Recent ADs Impacting the Cessna 310

Recent Airworthiness Directives (ADs) for the Cessna 310 address critical safety issues. One AD mandates inspections of fuel system components to prevent leaks‚ while another focuses on engine operation limits. Compliance ensures continued airworthiness and safety. Failure to adhere can lead to grounding. Stay updated on the latest ADs to maintain compliance and optimal aircraft performance.

DIY Maintenance and Repair

The Cessna 310 maintenance manual provides detailed instructions for owner-performed tasks‚ including inspections and minor repairs. It covers tools and procedures‚ enabling cost-effective‚ time-saving maintenance solutions for DIY enthusiasts and professionals alike.

8.1 Owner-Performed Maintenance Tasks

The Cessna 310 manual outlines specific tasks owners can perform‚ such as routine inspections‚ oil changes‚ and minor repairs. These tasks help reduce maintenance costs and foster a deeper understanding of the aircraft’s systems. The manual provides clear‚ step-by-step guidance‚ ensuring safety and compliance with FAA regulations. Regular owner-performed maintenance enhances aircraft reliability and extends its service life.

8.2 Best Practices for DIY Repairs

For successful DIY repairs on the Cessna 310‚ adhere to the manual’s guidelines‚ use approved tools‚ and follow FAA standards. Ensure all repairs align with the aircraft’s specifications. Regularly consult the manual for updates and always double-check work to maintain safety and airworthiness. Proper documentation of all maintenance activities is crucial for compliance and future reference.

Common Maintenance Issues

Frequent challenges include fuel system leaks‚ electrical malfunctions‚ and corrosion. Addressing these promptly ensures optimal performance‚ safety‚ and longevity of the aircraft.

9.1 Fuel System Maintenance

Regular inspection of fuel tanks‚ lines‚ and connectors is crucial to prevent leaks and contamination. Cleaning fuel filters and ensuring proper tank sealing are essential steps. Addressing any signs of corrosion or wear promptly helps maintain fuel system integrity‚ preventing engine performance issues and ensuring safe flight operations.

9.2 Electrical System Troubleshooting

Identifying electrical system issues involves checking power sources‚ circuit breakers‚ and wiring for damage or wear. Testing connectors and ensuring proper grounding is essential. Use diagnostic tools to trace faults and consult the manual for specific repair instructions. Regular inspections help prevent malfunctions‚ ensuring reliable electrical performance and safety during flight operations.

Aircraft Performance and Optimization

Enhancing fuel efficiency and performance involves optimizing engine settings‚ maintaining propeller pitch‚ and ensuring proper aircraft weight distribution. Regular maintenance ensures peak performance and operational efficiency.

10.1 Enhancing Fuel Efficiency

Optimizing fuel efficiency in the Cessna 310 involves a combination of engine maintenance‚ propeller adjustments‚ and flight techniques. Regular engine tune-ups‚ such as cleaning spark plugs and ensuring proper fuel-to-air mixture‚ can significantly reduce fuel consumption. Adjusting the propeller pitch to match the engine’s RPM range and maintaining its condition also enhances efficiency. Additionally‚ managing aircraft weight by removing unnecessary items and employing efficient climb and cruise techniques can further improve fuel economy. Pilots should consider leaning the fuel mixture‚ avoiding idling‚ and using GPS for optimal routing. Staying informed about manufacturer recommendations and service bulletins is also crucial for maximizing fuel efficiency. By integrating these strategies‚ pilots can achieve better performance while minimizing operational costs.

10.2 Performance Upgrades

Performance upgrades for the Cessna 310 include engine modifications‚ propeller improvements‚ and avionic enhancements. Upgrading to a Continental IO-550 engine or installing a three-blade Hartzell Scimitar propeller can significantly enhance climb rates and cruise speeds. Additional modifications‚ such as aerodynamic improvements or weight reductions‚ can further boost efficiency. Always ensure upgrades comply with STCs and airworthiness standards for safety and optimal performance.

Engine Model Considerations

The Cessna 310 primarily uses the Continental IO-470 fuel-injected engine‚ with varying models requiring specific maintenance procedures. Understanding engine differences ensures optimal performance and compliance with airworthiness standards.

11.1 Differences in Engine Models

The Cessna 310 is equipped with the Continental IO-470 engine‚ a fuel-injected‚ six-cylinder powerplant. Variations include the IO-470-C‚ -D‚ -H‚ and -M‚ each differing in power output‚ fuel system components‚ and specific maintenance requirements. These differences necessitate tailored inspection intervals and parts compatibility‚ ensuring adherence to manufacturer specifications for optimal performance and airworthiness.

11.2 Maintenance Specific to Engine Types

Specific maintenance tasks for Continental IO-470 engines include fuel injector cleaning‚ oil system checks‚ and cylinder compression tests. Regular inspection of fuel lines and ignition systems is crucial. Owners should follow detailed overhaul procedures and adhere to manufacturer guidelines to ensure engine longevity and reliability‚ addressing unique aspects of each engine variant for optimal performance and safety.

Troubleshooting Common Problems

The Cessna 310 manual provides guidance on diagnosing issues like fuel leaks‚ electrical malfunctions‚ and engine performance problems. It outlines diagnostic steps and repair solutions to ensure safety and efficiency.

12.1 Identifying and Addressing Issues

The manual provides detailed diagnostic tools to identify issues like fuel leaks or electrical faults. It guides users through systematic troubleshooting‚ ensuring accurate problem identification. Specific attention is given to engine performance anomalies in IO-470 models. Clear repair steps and documentation ensure compliance with airworthiness standards‚ making it a reliable resource for resolving common maintenance challenges efficiently.

12.2 Resources for Complex Repairs

The manual includes links to FAA Airworthiness Directives and Service Bulletins‚ ensuring compliance with critical safety standards. Detailed parts manuals‚ engine overhaul guides‚ and service bulletins from 1969-1974 are provided for reference. Additionally‚ official Cessna service bulletins and Continental IO-470 engine overhaul manuals are available‚ offering comprehensive support for intricate repairs and ensuring adherence to airworthiness standards.

Future Trends in Cessna 310 Maintenance

Advancements in technology‚ including digital tools and AI‚ alongside sustainable practices‚ are revolutionizing Cessna 310 maintenance‚ enhancing efficiency and eco-friendliness for future owners and technicians.

13.1 Advancements in Technology

Digital manuals and interactive tools are enhancing accessibility and precision in Cessna 310 maintenance. The use of AI-powered diagnostic systems streamlines issue identification‚ reducing downtime. Remote monitoring technologies enable real-time performance tracking‚ ensuring proactive maintenance. These advancements are making maintenance more efficient and data-driven‚ benefiting both owners and technicians.

13.2 Sustainability in Maintenance Practices

Sustainability in Cessna 310 maintenance involves eco-friendly practices‚ such as reducing waste and energy consumption. Techniques include using environmentally safe cleaning agents and optimizing resource use. Recycling programs for parts and materials are increasingly adopted. These practices align with global environmental trends‚ ensuring the aircraft’s longevity while minimizing its ecological footprint.

gaggia brera user manual

Welcome to the Gaggia Brera User Manual, your comprehensive guide to understanding and optimizing your espresso machine. This manual covers setup, brewing, maintenance, troubleshooting, and additional resources to ensure optimal performance and safety.

1.1 Overview of the Gaggia Brera

The Gaggia Brera is a compact, bean-to-cup espresso machine designed for home use; It features an intuitive interface, automatic grinding, and a 15-bar pump for authentic espresso. With a sleek design and user-friendly controls, the Brera is perfect for coffee enthusiasts seeking convenience and quality. Its 1.2-liter water tank and 256 x 447 x 315 mm dimensions make it ideal for small kitchens. Built for durability and ease of use, the Brera offers a seamless coffee-making experience.

1.2 Importance of the User Manual

The Gaggia Brera User Manual is essential for maximizing your machine’s potential and ensuring safe operation. It provides detailed instructions for setup, brewing, and maintenance, helping you achieve the perfect espresso. The manual also includes troubleshooting guides and safety precautions to prevent damage and ensure longevity. By following the manual, you can optimize performance, understand error codes, and maintain your machine effectively. It’s a vital resource for both new and experienced users to get the most out of their Gaggia Brera.

First Use and Initial Setup

Begin by carefully unpacking and inspecting your Gaggia Brera for any damage. Plug in the machine, fill the water tank, and complete the initial setup steps outlined in the manual to ensure proper function and safety.

2.1 Unboxing and Initial Checks

Start by carefully unboxing your Gaggia Brera and inspecting for any visible damage. Ensure all accessories, including the water tank and coffee scoop, are included. Before powering on, check for loose parts or packaging materials. Rinse the water tank and fill it with fresh water. Plug in the machine and perform a quick power-on test to ensure it functions properly. Refer to the manual for specific pre-use checks to guarantee safety and optimal performance.

2.2 Initial Setup Steps

After unboxing, rinse the water tank thoroughly and fill it with fresh water. Plug in the machine and turn it on to initiate the priming process, ensuring water flows through the system. Use the control panel to navigate through initial settings, such as selecting your preferred language and adjusting the clock. Insert the water filter if provided to prevent scaling. Finally, refer to the manual for any additional calibration steps to prepare your Gaggia Brera for its first use.

Machine Components and Features

The Gaggia Brera features a user-friendly control panel, bean-to-cup design, and essential accessories like a water tank and brew group. Its compact design ensures efficient operation and easy maintenance.

3.1 Control Panel Overview

The Gaggia Brera’s control panel is designed for intuitive operation. It features buttons for selecting coffee quantity, adjusting aroma strength, and a knob for hot water dispensing. The interface allows easy navigation through brewing options, ensuring a seamless experience for both espresso and milk-based beverages. LED indicators provide clear feedback, guiding users through each step of the brewing process. This user-friendly design makes it accessible for both beginners and experienced coffee enthusiasts to customize their perfect cup.

3.2 Key Accessories and Parts

The Gaggia Brera is equipped with essential accessories designed to optimize your coffee-making experience. The water tank holds fresh water, ensuring consistent brewing. The brew group is central to the espresso extraction process, while the included scoop and tamper help in measuring and compressing coffee grounds accurately. For maintenance, genuine Gaggia descaling solution and grease are provided to protect and extend the machine’s lifespan. These parts work together to ensure peak performance and delicious results.

Brewing Guide

Master brewing with the Gaggia Brera, designed for bean-to-cup perfection. Easily craft espresso, cappuccino, and latte with intuitive controls and customizable settings. Optimize flavor and crema with precision temperature and grind adjustment.

4.1 Pulling the Perfect Espresso

The Gaggia Brera simplifies crafting professional-quality espresso at home. Select the ideal amount of coffee beans using the intuitive interface. Adjust settings for strength, temperature, and grind size to suit your taste. Ensure fresh, high-quality beans are used for optimal flavor. Preheat the machine and portafilter before brewing. Use filtered water to prevent mineral buildup. The Brera’s 15-bar pump ensures balanced extraction. Follow these steps for a rich, creamy espresso with a velvety crema, perfect every time.

4.2 Preparing Cappuccino and Latte

The Gaggia Brera makes crafting cappuccinos and lattes effortless. Start by pulling a perfect espresso as described. Use the steam wand to froth milk to your desired consistency. For cappuccinos, combine 1/3 espresso, 1/3 frothed milk, and 1/3 steamed milk. Lattes require a higher milk-to-espresso ratio, with a thin layer of frothed milk on top. Adjust temperature and texture settings for personalized results. The Brera’s automatic steam control ensures precision, allowing you to create authentic café-style drinks at home with ease and consistency.

Maintenance and Cleaning

Regular maintenance ensures your Gaggia Brera operates efficiently. Clean the brew group, empty the drip tray, and wipe surfaces daily. Refer to the manual for detailed schedules.

5.1 Daily Cleaning Routine

Regular daily cleaning ensures optimal performance and longevity of your Gaggia Brera. Turn off the machine and unplug it before cleaning. Clean the brew group by rinsing it under warm water and drying thoroughly. Empty the drip tray and water tank, then refill with fresh water. Wipe all surfaces with a damp cloth, paying attention to the spout and control panel. Descale regularly using Gaggia-approved solutions to prevent mineral buildup and maintain flavor quality. Clean the steam wand after each use to prevent milk residue.

5.2 Descaling and Deep Cleaning

Descaling is essential to remove mineral buildup and ensure optimal water flow. Use the Gaggia-approved descaling solution to maintain machine performance. Run the solution through the machine as per the manual, then rinse thoroughly with fresh water. Perform deep cleaning every 3-6 months by soaking removable parts like the brew group and filters in warm soapy water. Dry all components thoroughly to prevent moisture buildup and maintain hygiene. Regular descaling and deep cleaning extend the machine’s lifespan and preserve coffee flavor quality.

Troubleshooting Common Issues

Identify common issues like error codes, machine noise, or water flow problems. Refer to the manual for solutions, such as resetting the machine or checking water levels.

6.1 Diagnosing Error Codes

Understand and resolve issues quickly by identifying error codes displayed on your Gaggia Brera. Common codes like E1 or E2 indicate specific problems, such as water flow or temperature issues. Refer to the manual for detailed explanations of each code. To diagnose, turn the machine off, then on again. If the issue persists, consult the troubleshooting guide or contact customer support for assistance. This section helps you identify and address problems efficiently, ensuring optimal machine performance.

6.2 Solving Common Problems

Address common issues with your Gaggia Brera by following tailored solutions. Low water flow? Check the tank level or clean the water filter. Coffee grounds in the brew head? Rinse thoroughly after each use. Descaling is essential to prevent mineral buildup. For error codes, reset the machine or refer to the troubleshooting guide. Always use Gaggia-approved cleaning products to avoid damage. Regular maintenance ensures longevity and optimal performance. If issues persist, consult the manual or contact customer support for further assistance.

Additional Resources and Support

Access the Gaggia Brera User Manual as a downloadable PDF for detailed guidance. Explore online support articles, troubleshooting guides, and customer service options for assistance with your machine.

7.1 Online Manuals and Guides

The Gaggia Brera User Manual is available as a downloadable PDF, offering detailed instructions for setup, brewing, and maintenance. Additional online resources include troubleshooting guides, parts diagrams, and service manuals. Visit the Gaggia UK Office website or explore the Gaggia Brera Support Library for comprehensive assistance. These resources ensure you have everything needed to optimize your machine’s performance and address any issues promptly.

7.2 Customer Support and Service Centers

Gaggia provides dedicated customer support through their official website and service centers. For assistance, visit the Gaggia UK Office website or use the online chat facility during office hours. Accessibility options like web chat are available for those unable to call. A global network of service centers ensures professional help is near. LiveChat support offers real-time solutions for troubleshooting and maintenance. Contact Gaggia directly for personalized guidance and to resolve any machine-related queries efficiently.

Congratulations on completing the Gaggia Brera User Manual! This comprehensive guide has equipped you with essential knowledge for optimal performance. Regular maintenance and proper troubleshooting will ensure longevity. For any issues, refer to the troubleshooting section. Happy brewing!

8.1 Final Tips for Optimal Use

For the best experience with your Gaggia Brera, ensure regular cleaning and descaling to maintain performance. Use high-quality coffee beans and adjust grind settings for perfect extraction; Always use Gaggia-approved accessories to avoid damage. Store the machine in a dry, cool place and follow the user manual for troubleshooting; Experiment with settings to find your ideal brew. Happy brewing!

8.2 Encouragement for Further Exploration

Now that you’ve mastered the basics, we encourage you to explore the full potential of your Gaggia Brera. Experiment with different coffee beans, grind settings, and brewing techniques to tailor your espresso experience. Dive into the downloadable manuals and support guides for in-depth insights. Join the Gaggia community to share tips and discover new recipes. Remember, your Brera is a versatile tool—keep exploring and enjoy the journey of crafting perfect cups!

apc back-ups 425 manual

The APC Back-UPS 425 provides reliable backup power and surge protection for home and business electronics‚ ensuring uninterrupted operation during power disruptions.

1.1 Overview of the APC Back-UPS 425

The APC Back-UPS 425 is a reliable uninterruptible power supply (UPS) designed to provide backup power and surge protection for home and office electronics. With a capacity of 425VA/120V‚ it offers six NEMA outlets‚ two of which are surge-protected only. The unit includes a replaceable battery‚ ensuring extended runtime for connected devices during power outages. It is compatible with a variety of electronics‚ including computers‚ routers‚ and gaming consoles. The UPS features a compact design and user-friendly interface‚ making it an ideal solution for safeguarding sensitive equipment from power disruptions and voltage fluctuations.

1.2 Key Features and Benefits

The APC Back-UPS 425 offers essential features for reliable power protection. It includes six NEMA outlets‚ with two providing surge protection only. The unit supports a 425VA/120V capacity‚ ensuring sufficient backup power for small electronics. Automatic voltage regulation and overload protection are included for added safety. The replaceable battery extends the UPS’s lifespan‚ while the compact design saves space. Compatibility with PowerChute software allows users to monitor and control the UPS via USB connectivity‚ enhancing functionality and ease of use for both home and office environments.

Installation and Setup

Unpack and place the UPS on a flat surface. Plug it into a nearby outlet and connect your devices to the provided outlets. Ensure proper ventilation for safe operation.

2.1 Unpacking and Physical Installation

Start by carefully unpacking the APC Back-UPS 425 from its box. Ensure all components‚ including the UPS‚ user manual‚ USB cable‚ and phone cable‚ are included. Place the UPS on a flat‚ stable surface in a well-ventilated area‚ avoiding direct sunlight or moisture. Plug the UPS into a nearby power outlet and allow it to charge for at least 8 hours before use. Connect your devices to the available outlets‚ ensuring they are within the UPS’s power capacity. Follow all safety guidelines to avoid damage or electrical hazards.

2.2 Connecting the Battery

Locate the battery compartment on the APC Back-UPS 425 and open it. Carefully remove the battery from its packaging and align it with the terminals inside the compartment. Connect the positive (+) and negative (-) cables to the corresponding terminals‚ ensuring they are securely fastened. Refer to the user manual for specific instructions. Once connected‚ close the compartment and ensure it is tightly sealed. Allow the battery to charge fully before use to ensure optimal performance and reliability.

2.3 Safety Precautions During Installation

Disconnect the APC Back-UPS 425 from power before installing or servicing to avoid electric shock. Wear protective gloves and safety glasses when handling internal components. Ensure the unit is placed on a stable‚ flat surface to prevent tipping. Avoid overloading the UPS with devices exceeding its capacity. Keep the battery away from children and avoid short-circuiting terminals. Follow the user manual for proper installation procedures and safety guidelines to ensure safe and reliable operation.

Key Specifications and Technical Details

The APC Back-UPS 425 offers 425 VA capacity‚ providing essential backup power for small devices and electronics‚ with surge protection and reliable performance during outages.

3.1 Power Capacity and Runtime

The APC Back-UPS 425 features a 425 VA power capacity‚ ensuring reliable backup for small electronics. Runtime varies depending on connected devices‚ with extended support for lower-power equipment. It provides sufficient power to keep routers‚ modems‚ and small computers operational during brief outages‚ allowing time for data saving or system shutdown. The unit is designed for efficient energy management‚ offering a balance between capacity and runtime for typical home office needs.

3.2 Input/Output Ratings

The APC Back-UPS 425 operates with an input voltage of 120V and provides an output voltage of 120V‚ ensuring compatibility with standard electrical systems. It features six NEMA outlets‚ with two surge-protected outlets and four that offer both surge protection and backup power. The unit is designed to support devices requiring up to 425 VA‚ making it suitable for small to medium-sized electronics. The input and output ratings are optimized for efficient power delivery‚ ensuring safe and reliable operation during both normal and backup conditions.

3.3 Compatibility with Devices

The APC Back-UPS 425 is designed to support a wide range of devices‚ including computers‚ gaming consoles‚ and network equipment. It features six NEMA outlets‚ with two dedicated for critical devices requiring both backup power and surge protection. The remaining four outlets provide surge protection for non-critical electronics. This versatility ensures seamless integration with home or office setups‚ safeguarding sensitive equipment from power fluctuations and surges while maintaining uninterrupted operation during outages.

Battery Management

The APC Back-UPS 425 features a user-replaceable battery‚ ensuring extended backup power. Proper installation and maintenance are crucial for optimal performance and longevity of the battery.

4.1 Battery Installation and Replacement

The APC Back-UPS 425 features a user-replaceable battery‚ designed for easy installation and maintenance. To install or replace the battery‚ first turn off the UPS and disconnect all devices. Open the battery compartment‚ located at the rear or bottom of the unit‚ and carefully remove the old battery. Insert the new battery‚ ensuring proper alignment and connection. Close the compartment and reconnect your devices. Always use a compatible replacement battery to maintain performance and safety. Refer to the manual for detailed instructions and safety precautions.

4.2 Charging and Maintenance Tips

For optimal performance‚ charge the APC Back-UPS 425 battery fully before first use. Avoid deep discharges to prolong battery life. Store the UPS in a cool‚ dry environment‚ away from direct sunlight. Regularly check the battery health using the PowerChute software. If unused for extended periods‚ charge the battery every 3-4 months. Ensure proper ventilation to prevent overheating. Clean terminals and contacts to maintain conductivity. Follow the manual’s guidelines for charging cycles and maintenance to ensure reliable backup power and extend the lifespan of your device.

Connectivity and Monitoring

The APC Back-UPS 425 features a USB port for connecting to a computer‚ enabling monitoring via PowerChute software for real-time status updates and customized settings.

5.1 USB Connectivity for Software Monitoring

The APC Back-UPS 425 includes a USB port for seamless connection to a computer‚ allowing users to monitor the UPS status using PowerChute Personal Edition software. This connectivity enables real-time updates on power conditions‚ battery levels‚ and runtime estimates. Users can download the software from APC’s official website‚ ensuring comprehensive monitoring and control. The USB connection also allows for automatic shutdown of connected devices during extended power outages‚ safeguarding data and equipment. This feature enhances overall system reliability and user convenience.

5.2 Using PowerChute Personal Edition Software

PowerChute Personal Edition software allows users to monitor and control the APC Back-UPS 425 from a connected computer. It provides real-time updates on power conditions‚ battery status‚ and remaining runtime. The software enables customizable shutdown options during outages‚ ensuring data protection and safe equipment shutdown. Users can download PowerChute from APC’s official website and install it on Windows or macOS systems. The intuitive interface offers alerts for power events and allows users to tailor settings for optimal performance‚ making it an essential tool for managing backup power effectively.

Troubleshooting Common Issues

Identify and resolve common issues like battery failure or power supply problems by checking connections‚ testing the battery‚ and using diagnostic tools provided in the manual.

6.1 Diagnosing Battery Failure

Diagnose battery failure by checking connections and using the UPS’s diagnostic mode. Ensure the battery is fully charged and test it under load. If issues persist‚ replace the battery. Always refer to the manual for detailed steps and troubleshooting guides to ensure proper diagnosis and maintenance.

6.2 Resolving Power Supply Problems

To resolve power supply issues‚ first check the UPS connections and ensure they are securely plugged in. Verify that the input voltage matches the UPS’s rated voltage. If the problem persists‚ reset the UPS by turning it off‚ unplugging it‚ and restarting after 30 seconds. For persistent issues‚ refer to the manual or contact APC support for assistance. Always ensure the UPS is used within its specified power capacity to avoid overloading and potential damage.

Advanced Features and Configuration

The APC Back-UPS 425 offers customizable settings for surge protection and backup power‚ allowing users to tailor configurations to specific device needs for enhanced performance.

7.1 Configuring Surge Protection Settings

Configuring surge protection settings on the APC Back-UPS 425 ensures optimal device safety. Users can adjust sensitivity levels to balance protection and minimize false triggers. Access the settings via the PowerChute software‚ selecting specific outlets for surge protection. Choose between standard or high-sensitivity modes based on the connected devices. Testing the configuration is recommended to confirm effectiveness. Proper setup ensures devices remain protected from voltage spikes without unnecessary shutdowns‚ providing peace of mind during power fluctuations or storms.

7.2 Customizing Backup Power Options

Customizing backup power options on the APC Back-UPS 425 allows users to tailor settings for specific needs. Through the PowerChute software‚ users can prioritize which devices receive power during outages. Set shutdown sequences to conserve battery life or schedule automatic shutdowns for non-critical systems. Adjust power thresholds to balance runtime and protection levels. Load shedding options enable disconnecting non-essential devices to extend backup power for critical systems. These settings ensure efficient energy use and maximize protection for high-priority equipment during power disruptions or failures.

Warranty and Support Information

The APC Back-UPS 425 is backed by a limited warranty and dedicated customer support. Contact APC support for assistance or visit their website for detailed warranty terms and resources.

8.1 Understanding the Warranty Terms

The APC Back-UPS 425 comes with a limited warranty that covers defective materials and workmanship. The warranty period varies by region but typically lasts for two to three years. It is essential to review the warranty document for specific details‚ as certain conditions‚ like misuse or tampering‚ may void coverage. For claims‚ contact APC support directly or visit their official website for guidance and required documentation. Proper registration and adherence to warranty terms ensure smooth claim processing and support.

8.2 Contacting APC Support

For assistance with the APC Back-UPS 425‚ visit the official APC website and navigate to the support section. Use the contact form‚ phone‚ or email options to reach their team. Regional support numbers are available for specific countries. Live chat is also accessible for quick inquiries. Ensure you have your product serial number and warranty details ready for efficient assistance. Support is typically available during business hours‚ Monday through Friday‚ depending on your location. For urgent issues‚ refer to the APC support website for emergency contact options. Always verify the contact methods from official sources.